Tuesday, November 26, 2013

Mini Miniature Apple Strudel Crumb Pie

MINI MINIATURE APPLE STRUDEL PIE
A Sweet Twist To Thanksgiving Apple Pie

My one and only lovely sister came up with the most amazing and delicious miniature apple strudel crumb pies! This recipe is so simple and easy to make and yet so mouth watering that there just never seems to be enough of. Since I always buy apples and always have them around for my kids or I to munch on, I decided to make this recipe as well. I made the recipe simply by taste, but next time I make it I'll try to make sure I measure the ingredients. My sister made hers extra sweet by adding more caramel, I made mines just a bit less sweeter than hers. I love desserts don't get me wrong, but not too sweet where I can't take more than one bite, if you know what I mean. This is a great and quick dessert that you can make for Thanksgiving, Christmas, Easter and any other Holiday! Or just because :) 


I will be making these sweet mini miniature apple strudel crumb pies and other amazing recipes that I'm so excited to make and share with loved ones for Thanksgiving!

Mini Miniature Apple Strudel Pie Recipe

For the Filling:
Apples (Red, Gala, Granny Smith)
White sugar
Brown Sugar
Cinnamon
Nutmeg

Crumb Topping
Flour
Butter
White Sugar
Pecan nuts or other nuts (optional)

Pie Crust
Caramel Topping
Powdered Sugar
Coconut oil for coating the pan

Mix Filling ingredients on the stove top in a pan until nice and soft. Sweeten after your liking. You can add more or less. When done let it cool. In the mean time, prepare the mini cupcake muffin pan by brushing a coat of coconut oil to each mold. Then take a pie crust sheet, roll it with a rolling pin and cut into small squares (about 2"). Place the squares of pie crust into the mini cupcake pan and fill each pie crust with the apple filling mixture. Next, mix flour, butter, sugar and nuts until you get a nice soft crumbled consistency. Add the crumb topping to the apple pies. Bake at 350 F for about 20 minutes or until golden brown.

Take out of the oven, drizzle some caramel topping to each miniature apple pie and finish off  by sprinkling some powdered sugar on top of each pie.


Sunday, November 17, 2013

Thanksgiving Turkey Craft

Fun Easy Thanksgiving Turkey Craft for kids

Today was fun craft day with my kids :) 
They loved making their turkeys for Thanksgiving. 


 I"m having trouble uploading more pictures. 
Template and instructions coming soon, once I figure this uploading situation out. Happy Fall y'all!

Wednesday, October 30, 2013

DELICIOUS HOT HOMEMADE BUNS BREAD RECIPE

DELICIOUS HOT HOMEMADE BUNS


I love making homemade bread and after experimenting over and over with many different types of bread recipes, I was glad to have finally find the perfect recipe. Since I've found my perfect homemade bread recipe, this time I decided to try to make homemade buns instead of bread, since we all like the yummy crust and there never seems to be enough. This way everyone gets their own bun. Oh my, did they came out delicious or what? And you know what my kids said? "Mommy when are you making more? These are so yummy!" That's it... from now on I'm making these hot homemade buns every chance I get instead of bread. They're way too good not to.

Here's my recipe that I have come to love. It's simple and easy and fast.

5 cups of flour
2 cups warm water
2 1/2 tablespoons lard
2 tablespoons yeast
2 tablespoons sugar
1 teaspoon salt

I cheat a little and use my bread maker for mixing the dough. In the bread maker, I add the flour, salt, lard and 1 tablespoon of sugar. Aside in a measuring cup I warm up half a cup of water and add the yeast and 1 tablespoon of sugar and let it grow. Once the yeast grows to about 1 cup line of the measuring cup, I add it to the flour mixture in the bread maker. Then I add the remaining 1 1/2 cup of warm water and put the bread maker on the "dough" setting. Once the dough is formed into a ball I let it rise inside the bread maker or take out and put into a bowl and cover with a kitchen towel to let rise while I make another batch. In the mean time I prepare my baking pan/sheet and line it with aluminum foil and grease it with oil. Once the dough rises, I punch it down and mix it up a bit. Then I break small amounts of dough and form it into small buns. At this point I make an egg wash mixture and brush the buns with it. Then I add sesame and poppy seeds and throw it in a hot oven and let it bake at 375 F until golden brown (20-30 min).


Truly the BEST homemade buns ever! You can eat them hot, with butter, as a sandwich or burger, or whatever suits your taste! Yummy!

EASY FAST VEGETABLE AND DUMPLINGS SOUP

EASY  FAST VEGETABLE AND DUMPLINGS SOUP

After a busy day running around doing errands, I pick up the kids from school only to hear them say "Mommy I'm hungry." What to make, what to make? Something fast, good and yet nutritious and healthy at the same time. I thought why not make some vegetable soup? Yep, a quick vegetable soup sounded delicious. The older girls helped peel the carrots and parsnips, then prep the veggies (cutting celery, carrots, parsnips and tomatoes) while I chopped the onions and garlic. I started off with sauteing the vegetables adding salt, pepper and vegeta and then adding water letting the water come to a boil. I wasn't sure whether to add some homemade pasta noodles or to make dumplings. As the soup was cooking on the stove, I decided to finally go with the dumplings. Besides I haven't made those in a while. So, I cracked a couple of eggs and started beating/scrambling them with a fork, seasoned with salt, then slowly incorporated cream of wheat (farina) to the egg mixture. When the vegetables in the soup were nice and tender like, with a spoon I scooped and dropped the cream of wheat egg mixture to the hot boiling soup. Within minutes the soup was done. I added some freshly chopped parsley and woala lunch was served! A simple fresh vegetable soup with dumplings. My kids loved it so much they had seconds.


Since my kids love soups and I'm a soup lover myself, I tend to make all sorts of different soups often. One ingredient that I love using in most of my soups is Vegeta. Vegeta is an awesome condiment which is of a mixture of different spices and vegetables that's used in many European kitchens. A must have in your kitchen! 


Tuesday, October 29, 2013

Favorite Fabric Store SAS

FABRIC SHOPPING AT FAVORITE FABRIC STORE SAS

Ohhh not again....well yes again...I stopped by my fabric store today and I wanted to get everything...of course I didn't, but I did grab these cute stuff...


 Aren't those polka dot elastic cute?


This aqua sweater knit for some reason was too pretty not to get.
Can 't wait to make something cute out of it yet simple.


And of course this dark chocolate brown sweater knit...still thinking what I want to make though...
I also got some stretch denim dark navy and silvery gray to make leggings.
Will post what I make soon :)


Sunday, October 27, 2013

SPAGHETTI SQUASH


EASY HEALTHY SPAGHETTI SQUASH LUNCH


So today, hubby went to church with all the kids and then to my in-laws house for lunch, while I stayed home finishing my studies. Well, lunch came along and I got hungry but didn't feel like making a huge meal since it was only me at home. I decided to finally bake the spaghetti squash I bought out of curiosity that's been sitting on my counter for like over two weeks. I heard that spaghetti squash is a healthier alternative to pasta, so I decided to buy it with the intention of wanting to try it one day. Well this was the day I decided to finally attempt to make spaghetti squash. And it was much easier than I thought it would be. I washed and cut the spaghetti squash in half, seasoned with salt, pepper and a little Vegeta, put it on a parchment lined baking sheet and baked at 375 degrees in the oven for about an hour and 45 minutes. I let it bake in the oven while I continued with my studies. When it was done, I took it out of the oven. Mmmm it smelled good!


With a fork, I carefully pulled the top of the squash part with the seeds off. This part you don't eat. I gave this part to my chickens and boy did they enjoy eating it :)


 Once the top of the squash with the seeds is removed, with a fork you can start pulling the spaghetti away from the inside of the squash shell. I was amazed how easy it was and so cute oh and of course healthy!


I seasoned with a little more salt and pepper, added some fresh dill and sprinkled some goat cheese on top. Yummy! It was so good and because it is so healthy, I didn't feel guilty having another serving. I added some hummus to the second serving and I gotta say it was delicious. 


I will be making spaghetti squash more often from now on and experience with some sauces and other toppings to create different healthy meals. Hubby and I love eating freshly made homemade food and I'm thankful that my children are unlike other kids, and that they love their vegetables, fruits, and prefer homemade meals over junk food or take out.

Tuesday, October 1, 2013

EASY BOYS T-SHIRT APPLIQUE TIE

EASY BOYS T-SHIRT APPLIQUE TIE


Another super easy project I made today in like 5 minutes was this Boys T-shirt Applique Tie for my son Johnathan. He loves his new shirt so much and wants me to make him more to wear to school. I've seen these shirts in stores but never really liked the fabric or style, plus I thought they were also too pricey, so I decided to make my own. I got some remnant fabric I had in my stash, my pencil and ruler and started designing the tie. Once the tie pattern was drawn and cut, I used HeatnBond Ultrabond applique and applied it to the tie, ironed it and then transferred it onto the t-shirt. After that I decided to top stitch the tie to make it look cuter. And that's it! There you have it super easy, super fast and super cute shirt for your little boy!


Now to make a couple more...oh and for my older son Colin...he likes the way it turned out.


CUTE OWL SEWING BUDDY

MY VERY OWN OWL SEWING BUDDY

I love checking out other blogs and seeing everyone's great ideas, and today I ran across the OWL SEWING BUDDY. Totally cute and great way to keep my things near by. I decided to make one out of the remnants I had and I must say it came out cute, although next time I'll make this I'll be using cotton like fabric...this upholstery type fabric was way too thick and hard to work with but in the end my owl pin cushion sewing buddy turned out okay...at least way better than a boring tomato pin cushion lol.


If you'd like to make your very own Owl Sewing Buddy like I did, you can find a great tutorial and FREE pattern here. The directions are very simple and easy to follow too. Hope you enjoy! Would love to see your Owl Sewing Buddy too :)  Thanks and Happy Sewing.

Monday, September 30, 2013

EASY TO MAKE CIRCLE SKIRT FOR GIRLS


EASY TO MAKE CIRCLE SKIRT FOR GIRLS


I used MADE circle skirt tutorial to help me with my first circle skirt. It was much simpler than I thought it would be and the best part No Seams!  I had some aqua blue plaid fabric that my mother in law gave me a while back which at the time I really had no clue what to make out of it, but with Project Run and Play sew along theme for the week being PLAID, I immediately thought of this fabric. It is a nice lightweight type of fabric which is perfect for that bouncy easy flowing type skirt.


First I measured my daughter's waist, added an extra inch for seam allowance, marked the fabric and then I measured how long I wanted the skirt to be, marked it with a pen then I cut up my 1/4 circle. I left a little extra because I wanted to have a little extra gathered shirred effect to the skirt. If you need help with measurements check out Dana's measurement instructions, she is really great at explaining everything in detail with easy to understand instructions.


After I cut my 1/4 circle I have my skirt and a smaller circle that I used and made a bow hair clip to match with the skirt. I serged the top and bottom of skirt to avoid fraying.


Next, I serged the elastic and sewed it down. (I know I had white thread in my serger, didn't want to change it since it's on the inside of the skirt and it won't show....although I kinda like it). Melissa, one of my daughters (the one modeling the outfit), said she likes it like this because it's easier to tell which is the front of the skirt and which is the back of the skirt. 


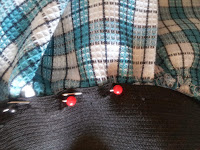
 I didn't like just putting together the elastic to the skirt piece without gathering the fabric a little. So I put the thread settings on high (4) and sewed a line at the top of my skirt. Then I gathered the fabric shirring up a little and then pinning it to the elastic for a perfect fit. It's much easier to sew like this.


I decided to complete the look by adding some beautiful crocheted lace trim I had to the bottom hem of the skirt.

The matching hair bow I made to match with the whole outfit.


EASY SHIRT TUTORIAL FOR GIRLS


EASY SHIRT TUTORIAL FOR GIRLS
XL T-shirt Repurposed into girls shirt


I decided to do the Project Run and Play Sew Along this week and I knew I needed a cute top or shirt to go with the aqua blue circle skirt I made but didn't have anything I liked that went with it. So I remembered that I purchased a brand new white XL t-shirt a while back for only 50cents, which was perfect cotton fabric for my new shirt that I wanted to make for my girl. My girls have a really cute shirt I like and they like so much so decided to made a pattern from that.
(sorry about some of the pics ended up side ways...I'll fix it when I figure it how)


These are the back and front pieces of the shirt I cut out.

 Unfortunately, I noticed that the front piece somehow I cut it too small, not sure how I managed to do that, I was trying to do it fast with my little ones around me. And so I thought I just ruined the shirt and had to figure out where to get another front piece from as I was looking at the left over remnant of the xl shirt I cut from originally. I noticed there was still some fabric left on the sides which was perfect. I immediately thought of making a shirred front, which was a perfect fix for my "mistake". And I love it better than my original plan. I cut the front part of the shirt right down the middle.

 Next I cut up one of the left over remnant side and made a 4 inch strip. Then I put my sewing machine on the highest thread setting (4) and sewed along both sides.

 After sewing along both sides of the 4 inch strip I slowly pulled the thread and gathered it to create a shirred look.


I shirred enough to make sure it fit just right between my front pattern pieces of the shirt.


Then I pinned it in place.


And serged it to the front shirt pieces.


After that was done I ironed it to stay nicely and then attached the back piece and pinned the sides and shoulder area, then serged and sewed through.


Then I thought about adding a little special touch, some aqua blue plaid fabric to match with the aqua blue plaid circle skirt. I measured the sleeve and cut. I should've left a little extra, next time I'll know better and make it right. Being my first time ever making this type of shirt I just went along with what I had and "fixed" my mistakes along the way to make it look better.


Then I pinned the arm sleeve and sewed all around.


For the neck part I wasn't quite sure what I really wanted. I serged the neckline then I folded it over and sewed all the way around the neck line.


I ended up adding some of the aqua blue plaid to the neck line to complete the look.


Here's the complete shirt and I must say I quite like it. It turned out way better than I thought.


Pictured below is the shirt with the matching Aqua Blue Plaid Circle Skirt, which I also have a tutorial for on my blog. I also made a matching bow hair clip to complete the outfit.


As long as my daughter loves it, I love it even more. Now my other girls want the same shirt as well. So I'll need to make a couple more shirts and have fun experiencing with different fabric. I'm also in the process of teaching them how to sew, so perhaps I'll help them make their own shirt. I'll try to make a tutorial or take pics and post them on the blog. I tried to explain the best I could, I'm not so good at explaining everything in detail, so hopefully my tutorials are easy to understand. Thanks everyone.


_______________________________________________________________________________